
A restaurant checkout setup is the systematic process of configuring your point-of-sale and online ordering systems to accept payments, manage orders, and deliver a fast, secure experience for every customer. Whether you run a busy city-centre takeaway or a multi-table dining room, getting this configuration right determines how quickly tables turn, how often online carts convert, and how cleanly your end-of-day reconciliation closes. This guide walks you through every stage of the process, from selecting the right tools to going live with confidence, using platforms like WooCommerce, Stripe, and dedicated POS hardware to meet the specific demands of hospitality.
What prerequisites and tools do you need for your restaurant checkout setup?
Before you configure a single payment field, you need the right foundation in place. Skipping this stage is the single most common reason restaurant checkout projects stall mid-build.
Platform and software requirements
For online ordering, WordPress combined with WooCommerce is the most widely adopted starting point for independent restaurants. You will also need a restaurant-specific plugin such as FoodMaster or a comparable ordering extension to handle menu display, delivery zones, and order types. These plugins add the hospitality logic that WooCommerce alone does not provide out of the box.
Hardware and payment gateways
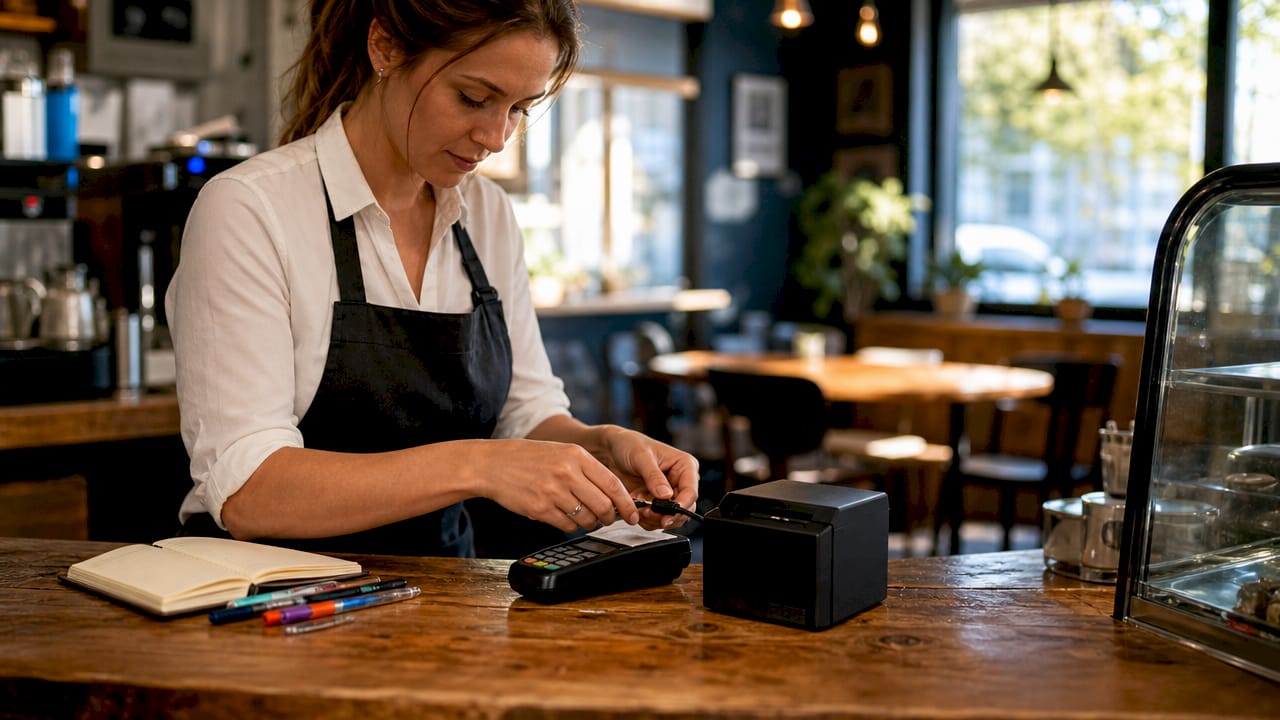
Your payment gateway choice shapes the entire customer experience. The three most-used options for UK restaurant operators are Stripe, PayPal, and Square. Each connects directly to WooCommerce and supports card-present transactions through compatible card readers. For in-venue payments, a POS terminal from a provider such as SAM4S or iMin handles table-side and counter transactions. You can explore POS hardware options to match your service style before committing to a configuration.
Business information and compliance essentials
Gather the following before you begin configuration:
- Full menu with item names, descriptions, prices, and modifiers
- Delivery zones with postcodes and minimum order values
- Tax rates applicable to your food and drink categories
- Store trading hours and any scheduled closures
- SSL certificate installed on your hosting environment
Hosted payment architecture keeps card data off your own servers, which reduces your PCI compliance scope considerably. Confirm your hosting provider supports SSL and meets basic PCI-DSS requirements before proceeding.
| Requirement | Purpose |
|---|---|
| WordPress + WooCommerce | Core platform for online ordering and checkout |
| Restaurant plugin (e.g. FoodMaster) | Menu management, delivery zones, order types |
| Payment gateway (Stripe, PayPal, Square) | Secure payment processing online and in-venue |
| POS terminal (SAM4S, iMin) | In-venue card-present transactions |
| SSL certificate | Encrypts customer data and satisfies PCI requirements |
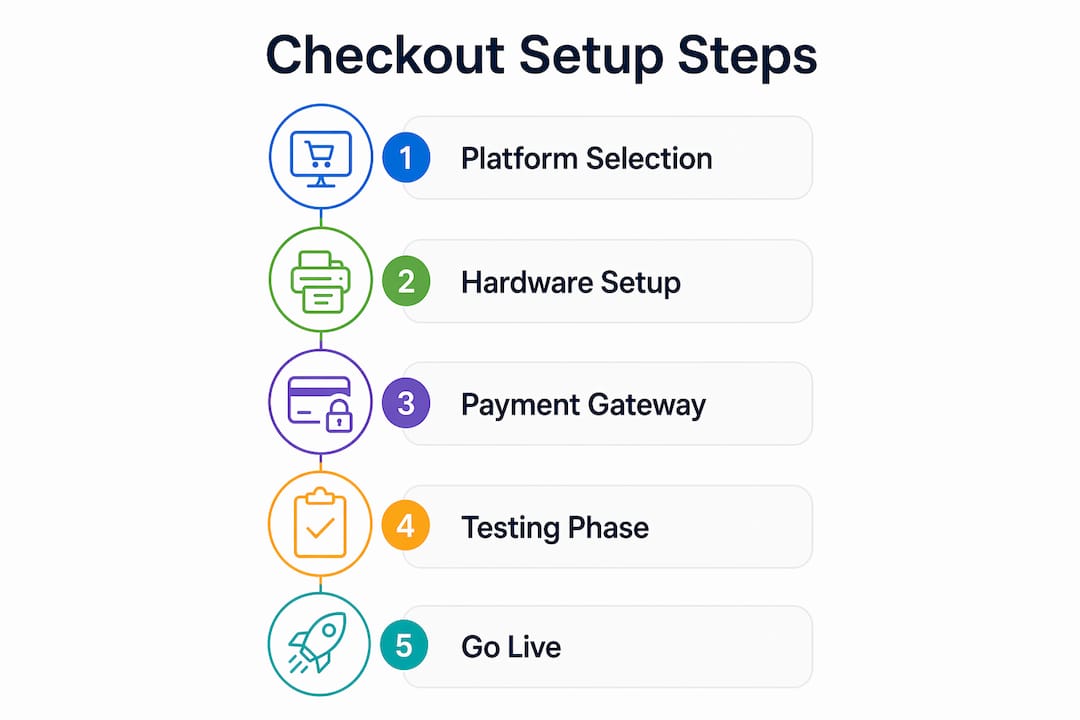
How do you configure the step-by-step checkout process for restaurant orders?
This is where the actual restaurant payment setup happens. Follow these steps in sequence to avoid configuration conflicts later.
-
Install WooCommerce and activate your restaurant plugin. From your WordPress dashboard, install WooCommerce and run the setup wizard. Then install your chosen restaurant ordering plugin and connect it to WooCommerce so that menu items appear as products with the correct order types (delivery, collection, dine-in).
-
Simplify your checkout fields. Reducing checkout fields to name, phone number, delivery address, and order notes directly increases mobile order completion rates. Remove billing company, county, and any field that does not affect order fulfilment. Every extra field is a reason for a mobile customer to abandon.
-
Install and configure your payment gateway plugin. For Stripe, install the official WooCommerce Stripe Payment Gateway plugin. Enter your publishable and secret API keys from your Stripe dashboard. Enable Payment Request Buttons to activate Apple Pay and Google Pay. Express payment options like these reduce checkout time to under 10 seconds for returning customers, which is a material conversion advantage during peak ordering hours.
-
Position express payment buttons correctly. Place Apple Pay and Google Pay buttons at the top of the checkout page, above your form fields. Square and Stripe both recommend this placement for mobile checkout because it intercepts returning customers before they reach the form entirely.
-
Set up webhooks for real-time order confirmation. In your Stripe or PayPal dashboard, create a webhook endpoint pointing to your WooCommerce site. This triggers automatic order status updates the moment a payment is confirmed, removing the delay between payment and kitchen notification.
-
Configure delivery zones, tax rates, and store hours. In WooCommerce settings, define each delivery zone with its postcode range and assign a delivery fee. Set tax rates to match HMRC food and drink categories. Use your restaurant plugin’s store hours feature to block orders outside trading times automatically.
Pro Tip: Enable sandbox or test mode in Stripe before going live. Run at least three test transactions covering a standard order, a failed card, and a refund to confirm your webhook and notification setup responds correctly to each scenario.
What are the best practices for optimising checkout and reducing payment friction?
Getting the configuration live is step one. Getting it to perform at its best requires a second pass focused on speed, accuracy, and repeat-customer experience.
Reduce friction at every touchpoint
Minimising checkout fields is the single highest-impact change you can make for mobile users, who represent the majority of restaurant online orders. Test your checkout on both Android and iOS before launch. A field that renders cleanly on desktop can break the mobile keyboard flow entirely.
Implement one-click checkout for repeat customers
One-click checkout allows returning customers to pay instantly using stored payment details. Stripe recognises returning customers by email and pre-fills their card and address information. For a restaurant with a loyal local customer base, this feature alone can lift repeat order rates noticeably.
Use embedded POS payments for in-venue reconciliation
Embedded payments process order-level details including modifiers, discounts, and split bills within the POS itself, rather than simply passing a total amount to a separate terminal. This means refunds and chargebacks match order records automatically, which removes the manual reconciliation work that costs restaurant managers significant time each week.
Hosted redirect versus embedded iframe: which is right for you?
| Approach | PCI scope | Customer experience | Best for |
|---|---|---|---|
| Hosted redirect (PSP page) | Lowest | Leaves your site briefly | Operators prioritising compliance simplicity |
| Embedded iframe | Medium | Stays on your site | Operators prioritising brand consistency |
| Full card capture on-site | Highest | Fully native | Large operators with dedicated compliance resource |
For most independent restaurants, a hosted redirect or iframe approach is the correct choice. It keeps card data off your servers while maintaining a clean customer journey.
Pro Tip: Display an estimated delivery or collection time on the order confirmation page. Customers who know their wait time are significantly less likely to call the restaurant to chase their order, which reduces front-of-house interruptions during service.
You can also review how retail checkout workflows handle field reduction to apply the same logic to your restaurant configuration.
How do you test, troubleshoot, and go live with your restaurant checkout?
A checkout that works in theory but fails at the moment of truth costs you real revenue and real customer trust. Follow this sequence before switching to live mode.
-
Run end-to-end test orders on both desktop and mobile. Place a full order from menu selection through to payment confirmation on at least two different devices. Confirm the order appears correctly in your WooCommerce order management panel.
-
Verify all notification emails. Post-checkout workflow verification means checking that the customer receives a confirmation email, your kitchen or staff receive an order notification, and the order status updates correctly in WooCommerce. A missed notification at any point breaks the fulfilment chain.
-
Test payment processing in sandbox mode, then live mode. Use Stripe’s test card numbers to simulate successful payments, declined cards, and authentication challenges. Once sandbox tests pass, switch to live mode and process a genuine low-value transaction to confirm the full payment flow.
-
Confirm delivery zone accuracy. Enter postcodes at the boundary of each delivery zone to verify the system accepts or rejects them correctly. An incorrectly configured zone boundary generates customer complaints and failed orders.
-
Check store hour enforcement. Attempt to place an order outside your configured trading hours to confirm the system blocks it. This prevents orders arriving when your kitchen is closed.
-
Review analytics after the first week of live trading. Identify the page or step where customers most commonly exit the checkout. A high drop-off rate at the payment step usually indicates a gateway configuration issue or a missing payment method.
Restaurant teams must treat checkout setup as extending beyond the customer screen. Order notification and staff processing workflows are part of the checkout system. If the kitchen does not receive the order, the payment success means nothing operationally.
Common mistakes to avoid: too many checkout fields, failing to test on mobile, not configuring webhooks, and leaving the system in sandbox mode after launch.
Key takeaways
A correctly configured restaurant checkout setup requires the right platform, minimal checkout fields, reliable payment gateway integration, and thorough testing before going live.
| Point | Details |
|---|---|
| Simplify checkout fields | Reduce to name, phone, address, and order notes to improve mobile conversion. |
| Use express payment options | Apple Pay and Google Pay via Stripe cut checkout time to under 10 seconds for returning customers. |
| Embed payments at order level | Deep POS integration matches refunds and chargebacks to order records, removing manual reconciliation. |
| Choose hosted payment architecture | Redirect-based checkout keeps card data off your servers and reduces PCI compliance scope. |
| Test before going live | Run end-to-end tests on desktop and mobile, including sandbox and live payment modes. |
What I have learned from watching restaurants go live with checkout setups
The operators who get checkout right the first time share one habit: they treat the payment configuration as a customer experience problem, not a technical one. Every decision, from which fields to include to where the Apple Pay button sits on the page, gets evaluated from the customer’s perspective first.
The biggest mistake I see repeatedly is building a checkout that works perfectly on a desktop browser and then discovering on launch day that the mobile experience is broken. Mobile orders now represent the majority of online restaurant transactions. If you have not tested your checkout on a real phone, on a real mobile network, before going live, you have not finished the setup.
I am also consistently surprised by how many operators skip deep POS integration in favour of a simple payment terminal that just takes a total amount. The reconciliation cost of that shortcut accumulates fast. When your payment records do not match your order records at the modifier and discount level, your end-of-day close takes far longer than it should, and your chargeback disputes become genuinely difficult to resolve.
The security question is simpler than most operators fear. A hosted redirect payment page, where the customer briefly visits the payment provider’s domain to enter card details, removes almost all of your PCI compliance burden. You do not need to store card data to run a great checkout. You just need to choose the right architecture from the start.
— John
How Ycr supports your restaurant checkout and POS setup
Ycr supplies the POS hardware and software that sit at the centre of a well-configured restaurant checkout. From SAM4S and iMin terminals built for counter and table-side service, to SAMTOUCH and EZEEPOS software designed specifically for hospitality, Ycr provides the physical and digital infrastructure your checkout depends on. Every product ships with next-day delivery and same-day dispatch options, so your setup timeline stays on track. Explore Ycr’s full POS hardware range to identify the right terminals and peripherals for your service model, or browse the complete POS software catalogue to find a solution that integrates with your chosen payment gateway.
FAQ
What is the first step in a restaurant checkout setup?
The first step is selecting your platform and payment gateway before configuring anything else. For online ordering, WordPress with WooCommerce and a restaurant plugin such as FoodMaster provides the correct foundation.
How many checkout fields should a restaurant use?
Limit checkout fields to name, phone number, delivery address, and order notes. Removing non-essential fields directly increases mobile order completion rates, which matter most for restaurant online orders.
Which payment gateway is best for a restaurant checkout?
Stripe is the most feature-complete option for restaurant operators, offering Payment Request Buttons for Apple Pay and Google Pay, one-click checkout for returning customers, and deep POS integration for order-level reconciliation.
How do I keep my restaurant checkout PCI compliant?
Use a hosted redirect payment page where customers enter card details on the payment provider’s domain. This approach keeps card data off your servers and significantly reduces your PCI compliance obligations.
How do I test my restaurant checkout before going live?
Run end-to-end test orders on desktop and mobile using your gateway’s sandbox mode, verify all notification emails reach the correct recipients, and confirm order status updates appear correctly in your order management system before switching to live payments.